Concrete prep determines whether epoxy bonds or peels. The product is secondary. A good system applied to a poorly prepared slab fails within months. Epoxy garage flooring in Toronto follows the same prep sequence as any GTA commercial or industrial floor: moisture test, crack repair, degreasing, surface profiling, priming, and cure time control. GLI Epoxy Flooring follows this protocol on every job before any coating goes down.
Why Prep Determines Whether Epoxy Bonds or Fails
Epoxy does not bond to concrete by chemistry alone. It bonds by mechanical adhesion. The surface must have an open, rough profile for the epoxy to grip. A smooth, sealed, or contaminated slab gives the coating nothing to hold. The result is peeling, bubbling, or full delamination within one to three years.
Most epoxy failures in Toronto trace back to three prep errors: skipping the moisture test, failing to profile the surface, and coating over unrepaired cracks. Fixing those three errors accounts for the bulk of prep work on any GTA floor.
Step 1: Test for Moisture Before Anything Else
Moisture in the concrete slab is the leading cause of epoxy delamination in Toronto. The city’s freeze-thaw cycles push moisture up through basement and grade-level slabs from March through May. Testing before coating is not optional.
The standard is the RH probe test (ASTM F2170). A probe is drilled into the slab and left for 24 hours to equilibrate. A reading above 75 percent RH requires a moisture-tolerant primer before any base coat is applied. Standard epoxy over a wet slab lifts from the slab within months.
Epoxy basement flooring in Toronto is one of the highest-moisture applications in GTA residential work. Moisture testing is standard on every basement floor before any spec is written.
Step 2: Inspect and Repair Cracks and Damaged Areas
Epoxy does not bridge cracks. It follows them. A crack in the slab will show through the coating within one to two years if not repaired first.
Hairline cracks under 1 mm wide are filled with a low-viscosity epoxy filler or polyurea crack compound. The filler cures fully before prep continues. Wider cracks, hollow areas, or spalling need repair with a concrete patching compound. Active cracks that are still moving need assessment to find the cause before any coating is applied.
The goal is a flat, stable surface with no voids, no loose aggregate, and no areas of delaminated concrete.
Step 3: Clean the Surface and Remove Contaminants
Oil, grease, paint, curing compounds, and adhesive residue all prevent epoxy from bonding. The surface must be clean before profiling begins.
Oil and grease are treated with a degreaser, scrubbed, and rinsed. The area is checked after drying. A stain that soaks back into the surface means oil persists in the slab and needs a second treatment or mechanical removal. Paint and old coatings are removed during the profiling step. Curing compounds and surface hardeners are removed mechanically.
The test for a clean, open surface is the water drop test. A few drops applied to the slab should absorb within 30 seconds. If water beads, the surface still has a sealer or contaminant layer that needs removal.
Step 4: Profile the Surface with Shot Blasting or Grinding
Surface profiling creates the mechanical anchor for the epoxy. Without it, the coating sits on top of the concrete rather than bonding into it.
Concrete shot blasting is the preferred method for GTA commercial floors and large residential slabs. A machine drives steel shot at the surface at high speed. The impact removes laitance, opens the concrete pores, and creates a uniform rough texture. The ICRI profile standard for most epoxy systems is a CSP 3 to CSP 5. Shot blasting reaches this without chemicals or water.
Diamond grinding is used in smaller spaces, near walls, and in areas a walk-behind blasting machine cannot reach. Both methods are often used on the same floor.
GLI Epoxy Flooring uses industrial shot blasting on commercial and large residential floors across the GTA. The machine recovers spent shot and dust in a sealed system, leaving the floor clean and ready for inspection.
Proper surface prep takes time and equipment most property owners do not have on site. Call 416-899-2141 or book a free site assessment to have the slab reviewed before any product is chosen.
Step 5: Prime the Slab
Priming is the step most skipped on lower-cost installs. It is also one of the most critical.
A primer coat soaks into the open pores of the profiled concrete and creates a sealed, even base for the epoxy. Without a primer, the first base coat absorbs unevenly into the slab and creates thin spots. Thin spots fail first.
For slabs with elevated moisture, a moisture-barrier or moisture-tolerant epoxy primer goes down first. These products bond to damp concrete and block vapour from below. GLI Epoxy Flooring applies a primer on every install before the base coat is mixed. The primer is applied at the spec spread rate and left to reach full tack before the base coat follows.
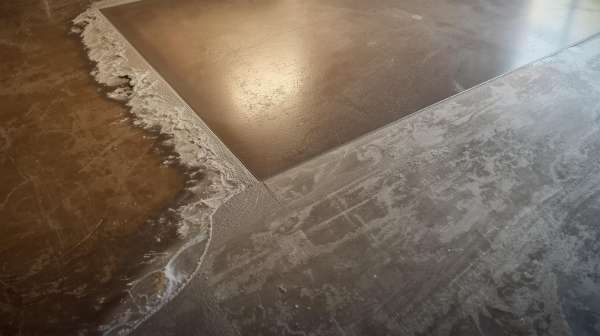
Step 6: Allow Cure Time at Each Stage
Epoxy is sensitive to temperature and humidity at every stage. In Toronto, this matters most in the shoulder seasons: spring installs on cold slabs and fall installs as temperatures drop.
The concrete surface temperature must be at least 3°C above the dew point before any coat is applied. This stops condensation from forming under the coating. Most epoxy products need a slab temperature between 10°C and 25°C for proper cure.
Each coat must reach the correct cure stage before the next one goes down. Applying the base coat over an under-cured primer, or the topcoat over an under-cured base, causes delamination between layers. Cold slabs extend cure time. Heated spaces speed it up.
Common Prep Mistakes That Cause Epoxy to Fail in Toronto
Most epoxy failures in the GTA are prep failures, not product failures.
Skipping the moisture test is the most common. The slab looks dry. It is not. Moisture rises from below, not from the surface down.
No surface profiling is the second. An acid-etched or sanded surface is not the same as a shot-blasted or ground surface. The profile must match the system spec.
Coating over repaired areas too soon is the third. Patching compounds need full cure before grinding or blasting continues over them.
Grinding without dust control creates a silica hazard. The CCOHS guidance on silica dust sets out the exposure limits and controls that apply to concrete grinding in Canada. Dust collection and respiratory protection are required on any GTA job where grinding produces visible dust.
Applying epoxy outside the temperature window is the fifth. Epoxy applied below 10°C may cure soft or not fully cure at all.
GLI Epoxy Flooring carries out a pre-coat checklist on every job to confirm moisture, profile, cleanliness, temperature, and cure stage before any product is mixed.
Conclusion
Concrete prep is not a step that can be shortened without shortening the floor’s life. Moisture testing, crack repair, degreasing, surface profiling, priming, and cure-time control are all part of a complete prep sequence. Skipping any one of them creates a failure point.
The article on how to choose the right epoxy flooring system for your property covers system selection after prep is complete, including base coat types, topcoat options, and build thickness for different GTA applications.
GLI Epoxy Flooring provides full concrete prep and epoxy installation for residential and commercial floors across Toronto and the GTA. Call 416-899-2141 or book a free site assessment to have the slab assessed before any product is chosen.
Frequently Asked Questions
1. Do I need to acid etch concrete before applying epoxy in Toronto?
Acid etching opens the concrete but does not create the surface profile epoxy needs to bond. Shot blasting or diamond grinding is the standard for GTA installs. Etching is sometimes used on small residential floors but is not the spec for commercial jobs, garage floors, or any system above 2 mm build.
2. How do I test concrete for moisture before applying epoxy?
The standard test for concrete moisture in Canada is the RH probe test (ASTM F2170). A probe is placed in a drilled hole and left for 24 hours. A reading above 75 percent RH means the slab needs a moisture-tolerant primer before any epoxy goes down. Skipping this step is the most common reason GTA epoxy installs fail.
3. How long after pouring new concrete can I apply epoxy in Toronto?
New concrete in Toronto needs at least 28 days to cure before epoxy can go down. This allows most of the pour moisture to leave the slab. An RH probe test is still needed even after the wait. Slabs poured in spring or fall often take longer due to colder ground temperatures and slower moisture release from the slab.
4. Can epoxy be applied over cracked concrete?
Epoxy can go over cracked concrete if cracks are repaired first. Hairline cracks under 1 mm are filled with epoxy filler or polyurea compound before coating. Cracks wider than 3 mm need assessment before any coating goes down. Coating over live cracks causes the epoxy to crack in the same spot within one to two years.
5. What is concrete shot blasting and why does it matter for epoxy?
Concrete shot blasting fires steel shot at high speed across the slab surface. It removes laitance, old coatings, and contaminants while creating a rough surface profile. It is the most common prep method for GTA commercial floors before epoxy because it is fast, dry, and leaves no chemical waste on the slab.
6. How thick does epoxy need to be applied over prepared concrete?
After surface prep, epoxy needs the concrete surface temperature to be between 10°C and 25°C and the slab moisture within spec. The first base coat goes down at the correct spread rate to achieve the spec film build. On GTA commercial floors, this is usually 3 to 4 mm total for the base and topcoat combined.